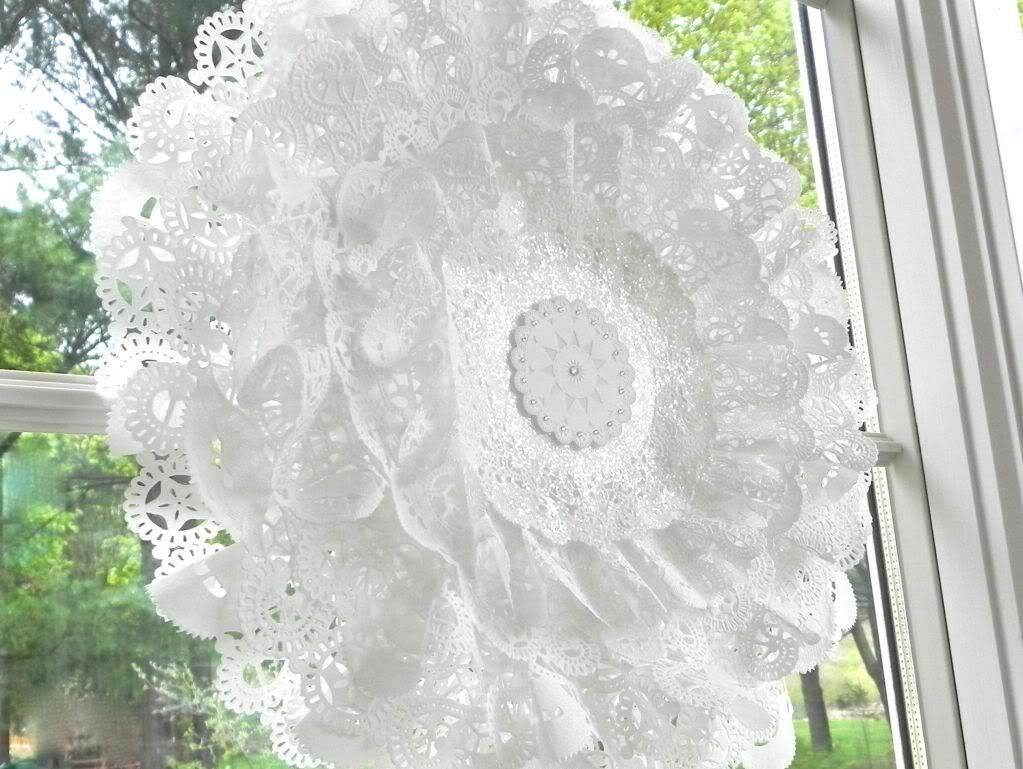
There just isn’t much anyone who loves paper lace wouldn’t love about this gorgeous 15 inch decorative hanging! Miss Party is loving it!! She can just see a beautiful Inspiration Fabric backdrop, ruffled streamers or big, tissue poms hanging from the ceiling at the corners of the table and then one impressive Ruffled and Glittered Party Decor Hanging in the center so everyone can admire it’s loveliness!
1 (14 in.), 7 (12 in.), 1 (8 or 10 in.), 3 (8 in.), 1 (6 in.) white paper lace doilies
Martha Stewart Crystal Coarse Glitter
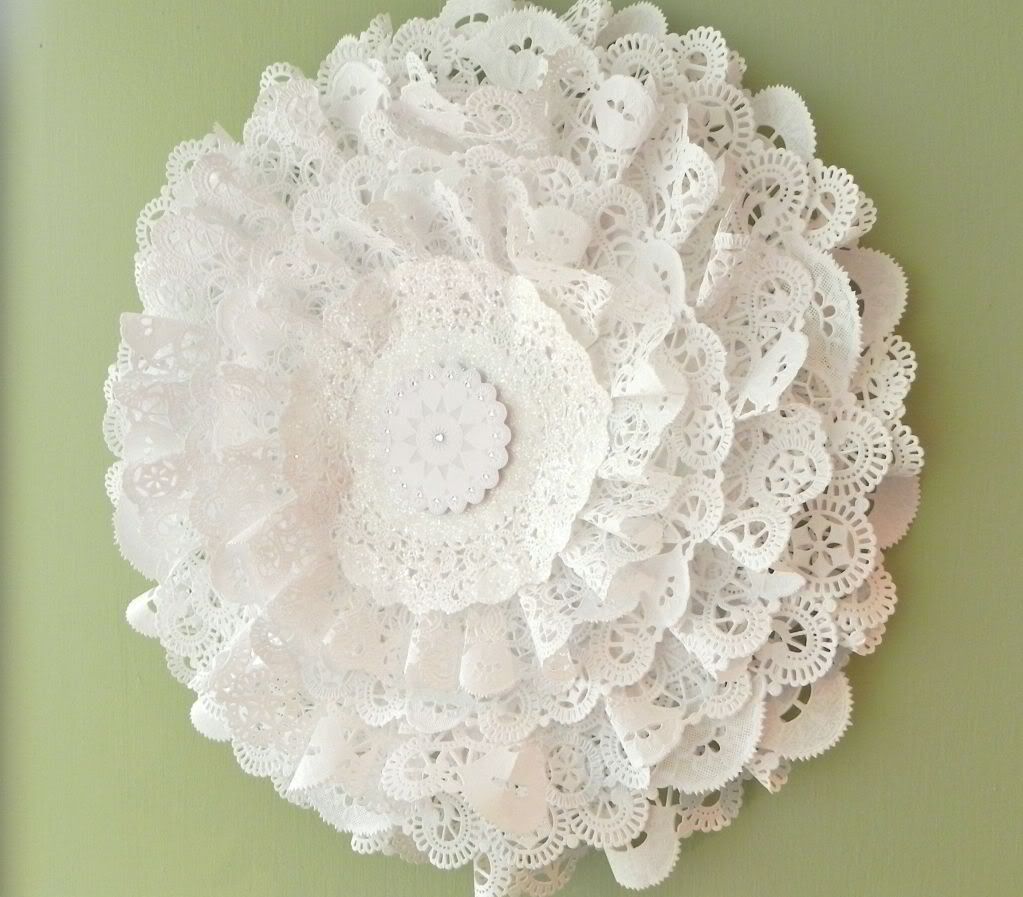
Martha Stewart 1 pkg. “Large Layered Doily and Gem Stickers” or other white paper center or diamond embelishments
Glue Dots
Double stick tape
glue stick
scissors
invisible thread or fishing line
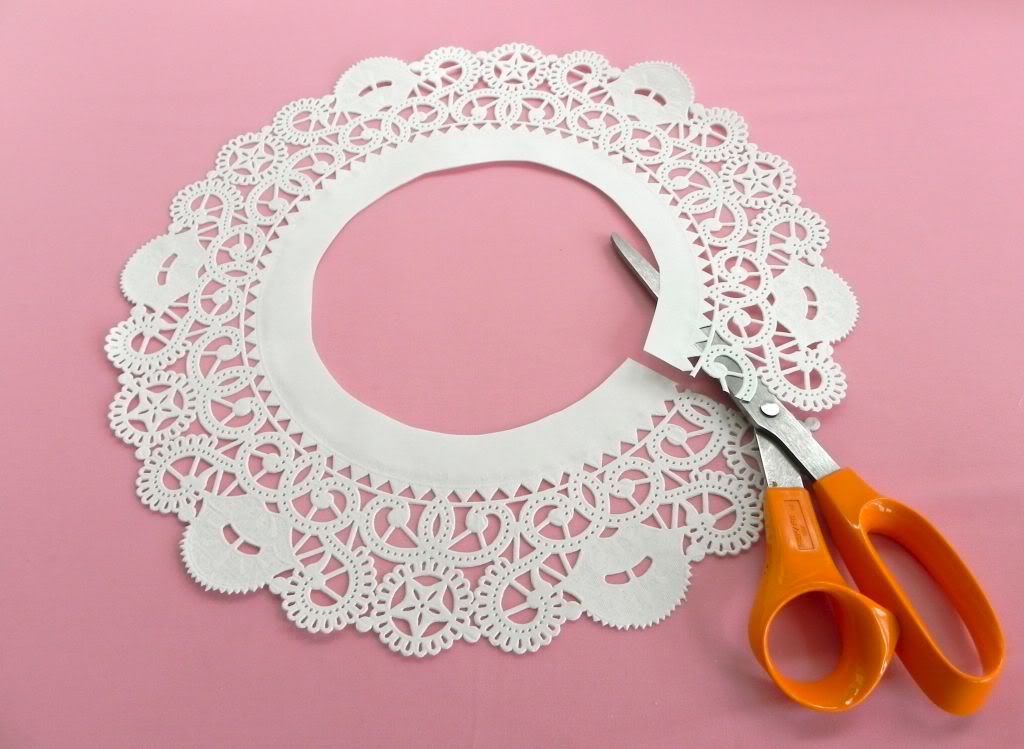
Cover your work surface with plastic not paper. Note there is a ‘right side’ and ‘back side’ to each doily, as in fabric. You will want to take care that the you face the ‘right sides’ out on the front of your hanging.
1) Cut out the center of 3 (12 in.) doilies (leaving 1 inch of the solid paper center with the lace section) as the picture shows.
2) Run a 3 inch strip of double stick tape or use your glue stick just at the bottom of the 14 in lace doily border. Attach the ‘right side’ of the lace circle strip to the ‘back side’ of a 14 in. doily, (shift the lace strip so that it will extend past the outer edge of the 14 inch doily by a 1/2 inch or so); make a gathering fold every 2 inches or so. (See picture for visual.) Continue gluing and gathering the lace strip working around the circle. Add on the second and third lace strips as needed to finish the circle.
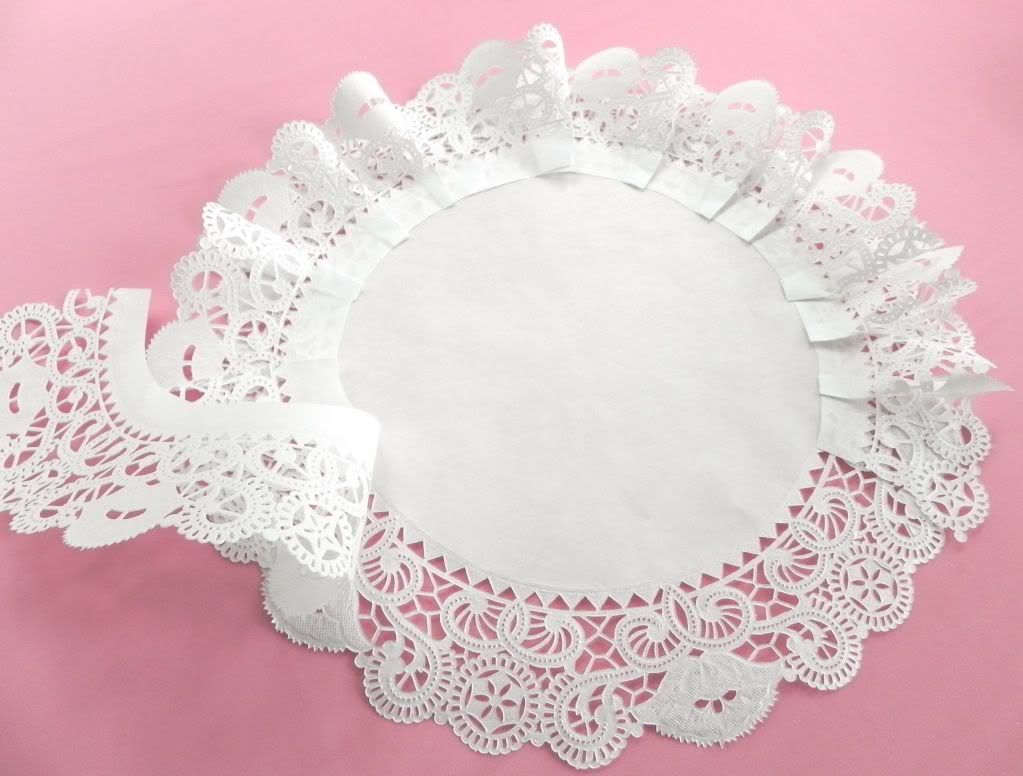
3) Finish off the ‘back side’ of the ruffled edge by attaching an 10″ or 8″ doily with double stick tape or glue stick.
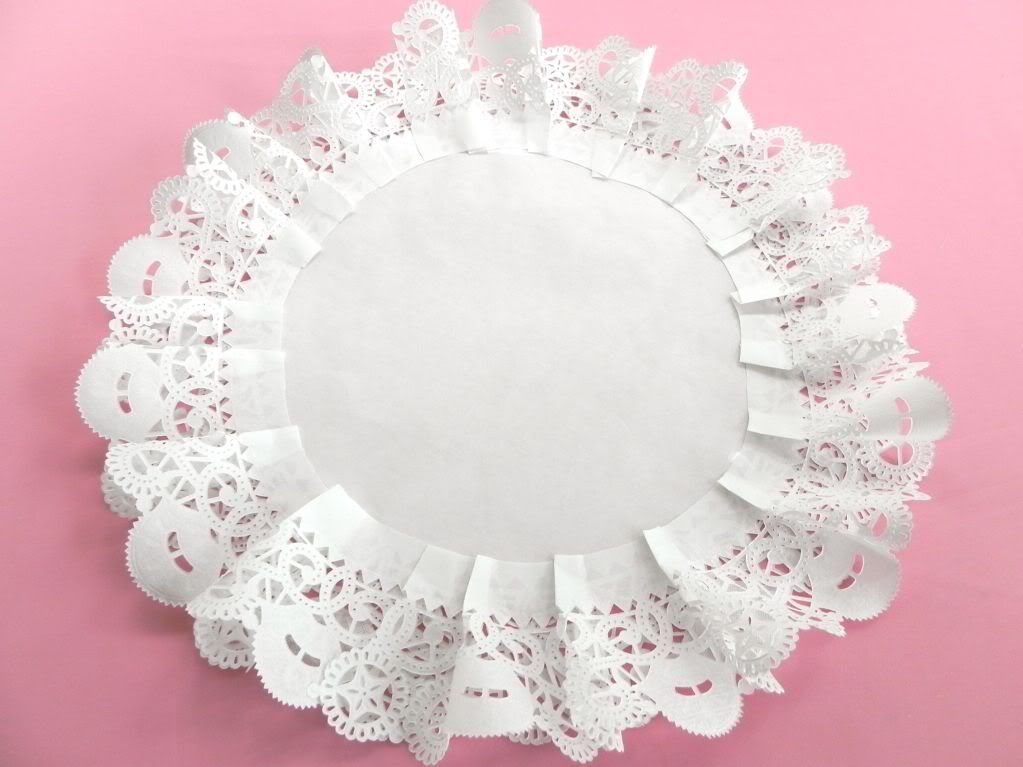
4) Turn the 14 inch doily over to the ‘right side’. Repeat steps 1 and 2 to add another ruffled layer and flat layer. Use 3 (12 in.) doilies for the ruffled strips, and 1 (8 in.) doily for the flat layer.
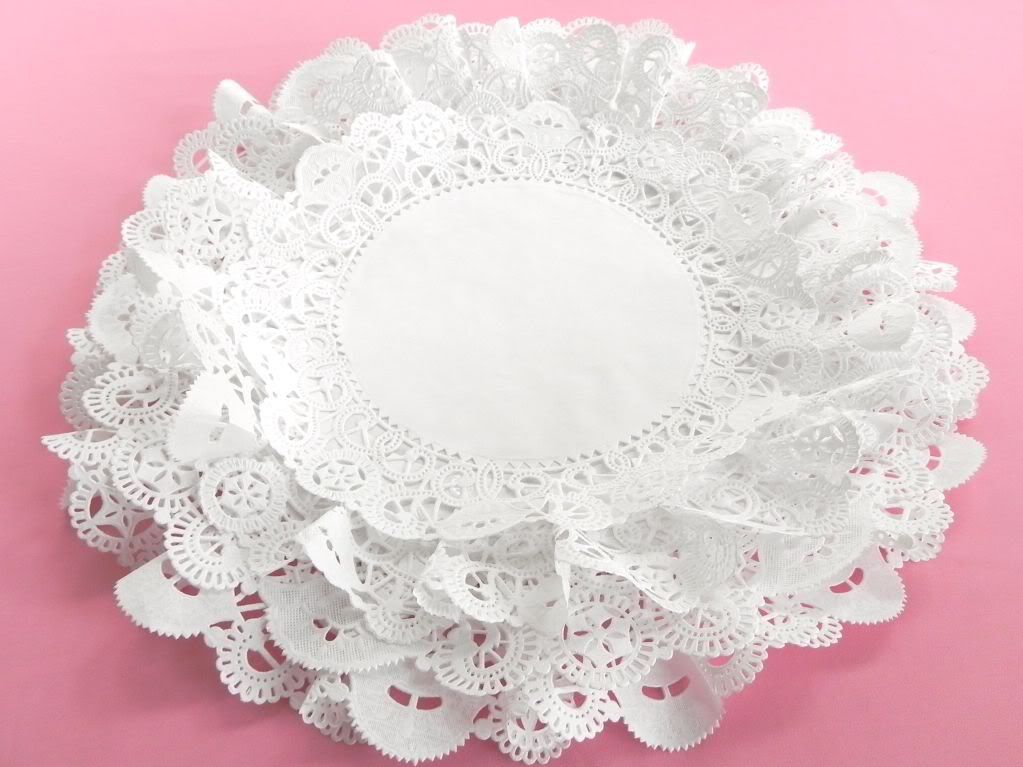
5) Repeat steps 1 and 2 one more time with 3 (8 in.) doilies for the ruffled strips. When you get to the final flat doily, use 1 (6 in.) doily. Over a piece of scrap paper, completely cover the ‘right side’ of the 6″doily with glue stick glue, sprinkle glitter over the entire surface of the doily. Pat the glitter down on the doily to be sure it has adhered, shake off excess. Use glue dots to gently attach the glittered doily to the center of the hanging.
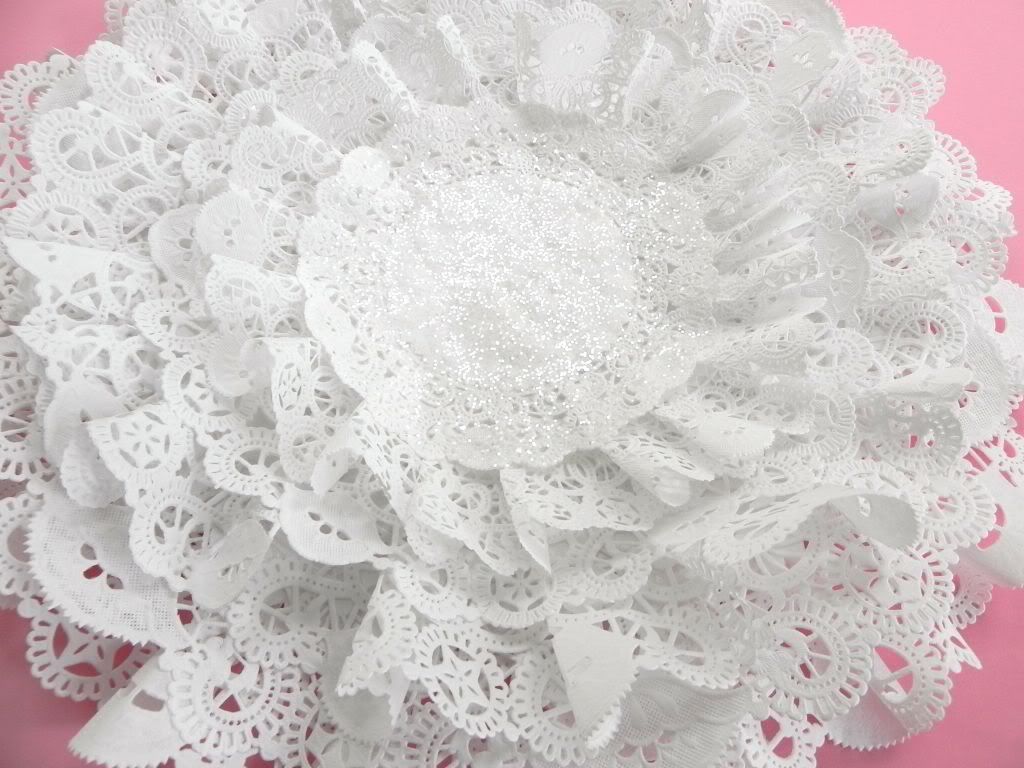
6) The final touch is the center paper sticker or other rhinestone center of your choice. Or you could choose not to add anything further.
7) Thread a 10 foot piece of invisible thread through largest doily cut out, catching several doilies if possible. Tie off the ends. Hang from the ceiling where desired.
Courtesy:
Miss Party


