Wednesday, October 27, 2010

HALLOWEEN IS THIS WEEKEND!!!


Many of you have plans already for Halloween Party, but are you still struggle in how to make delicious candy corn? Thanks for our Friend Amy Atlas and The Curves Carrot now is possible.

Cute and Yummy Candy Corn Cupcakes via Amy Atlas (She is publishing a dessert table book)
Recipe by The Curvy Carrot

I hope you all enjoy this and have a wonderful Happy Halloween :D

With love,
Ilovedielines Studio

Tuesday, October 26, 2010

GIVEAWAY TIME

Hello my friends :D
I want to communicate that I'm hosting a giveaway at THE FROSTED BUTTON BLOG
BELOW THE RULES
Here's how to enter:

Mandatory First Entry:
1. Visit Ilovedieline Studio, then come back here and tell me what your favorite item is. ( 1 entry)

Extra Entries:
1. Heart Ilovedieline Studio's Etsy shop ( 1 entry)
2. Follow this blog (1 entry The Frosted Button)
3. Blog, Facebook, Tweet this giveaway ( 2 entries for each thing you do)
4. Buy and item from Ilovedieline Studio's shop (10 entries)
5. Follow Ilovedieline Studio's blog:

YOU CAN WIN THESE BEAUTIFUL HEARTS NOTE CARDS


P.S. DO NOT POSTED YOUR ENTRIES IN HERE BUT IN "THE FROSTED BUTTON BLOG"
FEEL FREE TO COMMENT IN HERE BUT IT WON'T BE COUNT FOR THE GIVEAWAY :D

Thanks,
Ilovedielines Studio

Wednesday, October 20, 2010

BUTTERFLY IN LOVE

After watched this video, I got inspired by doing butterflies die-cut note cards. I hope you all love it :D. Please see below the video to take a peak at my NOTE CARDS.


Here to Shop
With love Ilovedielines Studio

Monday, October 18, 2010

DIY: Gorgeous Chiffon and Tulle Flowers

This is very nice tutorial of how to made this pretty Flower, materials you can find it at Michael, Joann or any other craft stores. I hope you enjoy it :D


You will need:
  • Chiffon and tulle.
  • Yardage needed will vary based on the number and size of flowers, as well as the fabric thickness.
  • Piece of paper
  • A pen
  • Scissors
  • Pins
  • Needle
  • Thread
  • Glass seed beads
  • Plain hair clip or comb.
Step 1) To make a stencil first free hand a rose petal shape and cut out. Then retrace it five times on a larger sheet of paper to create a full flower shape. This will help you get an even pattern. Cut out pattern.


Step 2)Take some fabric and fold it into a square a little larger than your flower pattern. Pin the pattern to fabric and carefully cut out. Repeat this process until you have enough layers to make a full flower - the number of layers will vary depending on the weight of your fabrics and the size of your flower. The example shown here uses 26 layers.


Step 3)Stack flower cut outs, alternating fabric types and staggering petals. Use a needle and thread to secure them together at the center.


Step 4)Pinch together the center of the flower (from the bottom) and secure with stitches to create volume and give the flower and authentic shape.


Step 5)If desired you can sew decorative beads in the inside center of the flower.


Step 6)Finally, sew the flower to a hair clip or comb.


You can also create a tie-on corsage or sash, by sewing one or more flowers to a length of silk ribbon.


Courtesy: Project Wedding

Friday, October 15, 2010

PAPER SCRAPS + CELERY = FABULUOS GIFT WRAP

Yes, you read the title correctly... Celery! Today I put together a little photo tutorial on creating your own gift wrap and tags using celery as a stamping tool. This has been done before (it's not an original concept)... this is just my take on it.


You will need:

For the Gift Tissue (shown in the main image) you will need:

  • Scraps of tissue paper (white or colored)
  • Scissors
  • Paint (I used acrylic, but you can try other options)
  • Celery stock base. You will need to have cut this as smoothly as possible to leave a nice straight stamping surface)
  • Art tray or plate (basically just a flat surface that you can pour your paint onto)

For the Gift Tags:

  • All the supplies listed above + paper scraps such as paper grocery bags, patterned, lined or graph papers
  • Standard Hole Punch
  • Large craft punches in the sizes you wish
  • Twine, ribbon, or string.

Optional:

  • Jazz up your package with little treasures from around your home. Buttons, beads, pinecones, mini animal figurines, etc... all have potential!
  • Create sturdier gift wrap using paper grocery bags (for small gifts) or kraft papers.
  • Don't forget to save the wrapping after your gifts have been unwrapped. Even if it's been torn you can still create gift tags, etc from the leftovers!

Step 1) Cut open a brown paper bag so that it lays relatively flat. You can use either the printed side or the blank reverse (I used the printed in my example because I really loved the design).
Step 2) Put paint (any color you want) onto your tray/plate (you may need to brush it around so that it's not all in one lump). Take your prepared celery stamp and dip it into your paint. Check and be sure that it's fully coated.
Step 3) Press your stamp down onto your paper with steady even pressure. Be sure not to rock it from side to side or let it slide around. Lift off your paper with a smooth motion.
Step 4) Repeat as desired. In the image I am stamping an area intended for gift tags, so I chose to make more than one print so that I could cut several tags from it.
Step 5) Once your stamp has dried (if you're impatient like me, you can dry it with a hairdryer on a low setting) use craft punches to cut out your tags. Punch at the top with a standard hole punch (so you can string twine through it later).
Step 6) Using tissue paper or other gift wrap sized paper, repeat steps above until paper is covered in as many stamps as you like. TIP: For tissue and other thin papers, be sure to place a scrap piece of paper beneath the sheet you are working on in case some of the paint comes through. If you use more than one celery stalk you can overlay colors for a really cool effect.
Step 7) Allow paper to dry completely and then wrap up your gifts.
Step 8) Embellish as you like!

This is also a great project to do with the kids in your life. Always be sure to supervise, and take care when selecting your paint (you might want to pick something that is not permanent). Whomever you create this with or for, have fun!

Courtesy: creaturecomfortsblog

FOR NONCOMMERCIAL USE ONLY

Vintage Bikes in 2010


Most of the time, every afternoon I always surf at www.ffffound.com and I found these pretty bikes in vintage style with name on it. I wish somewhere in this world "bike shopper" can make this possible in a low budget ^^, but sadly, these ones have been photoshopped 99% sure .
Whatever it is the case, I will use these are my inspirations on creating "bike cards" to the vintage style. Hopefully I can be successful with this idea and you all love it.

P.S. These bikes need pedals ^^

Tuesday, October 12, 2010

MAKE THE WEDDING FOR EVERYDAY


Credits:
Picture 1: clairelafaye
Picture 2: mignonnehandmade
Picture 3: JLWeddings
Picture 4: LittleWhiteDresser
Picture 5: yourfairytalewedding


Laces, white, cream, pattern, bows, vintage were my inspiration for my new design line which is "working with doilies and Kraft paper". Note Cards with white Doilie can be use not necessary for Thank you wedding cards but also for everyday Note Cards as vintage look and contemporary style. The envelopes with white Doilie and Inserts is a very cute little add for your pockets messages between lovely friends or co-workers. Also can be use for "Thank you" cards for your bridesmaids.
I hope you like the new design line, look forward to see more designs with doilies since October is the month of the weddings.
Now available in my Ilovedielines Studio store "Doilies Envelopes with Inserts" and "Doilies Note Cards"


Monday, October 11, 2010

SINFUL AND CALORIES FREE

SINFUL AND CALORIES FREE? What?
Yes, now it is possible with 
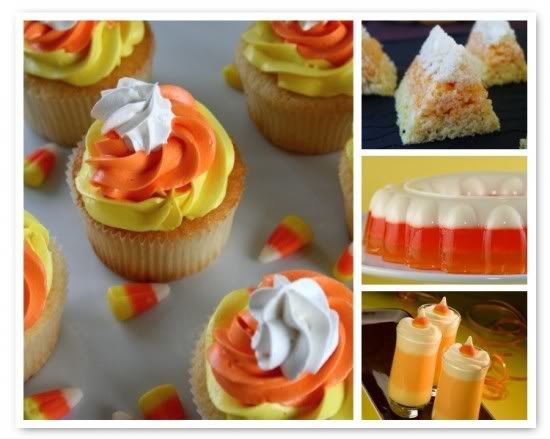
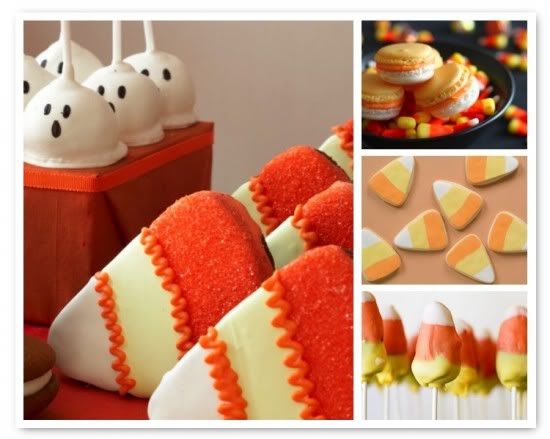
AJSWEETSOAPS, this store in Etsy has the most unique soaps you can imaging and find in Etsy. Who wouldn't like to have cupcakes in your bath as soaps? Or creepy hands for your Halloween Party.
Our dear friend Denise (the person who run AJSWEETSOAPS) can turn any dessert you have in mind into soap, how great that can be?
Here it is a mini description of her store "AJSweetSoap - where luxurious, spa-quality handmade vegan soap is deliciously transformed into all things uniquely decadent! You'll find rich cakes, luscious donuts, sinful chocolate, sweet cake, classic cookies, retro candy and freshly iced bakery buttercream cupcakes - all things luscious, sinful and calorie free! Be sure to check out our fantastic food soaps, too, which are so realistic, you'll want to take a bite! Faux food doesn't get any better (or more fun) than this!"
It is not me only who says that its product and customer service is awesome.
Here it is some feedbacks of its customer:
WORDMERMAID says: "WHAT a wonderful smell in my hallway now. Adorable pumpkin too sweet to use! THE BEST products at the best prices with great packaging and fast delivery. Terrific customer service! SHOP HERE!!!! A+"
WHOSESHOEJAN says: "I am an Avid online shopper and this transaction takes the CAKE!! The shipping was FAST, the packaging was PERFECT, the item was even BETTER than described on the site. The price was Great. I would Definitely purchase from this vendor again. HATS OFF to AJSweetSoap. This is the best transaction I have had in years. Thanks very much"

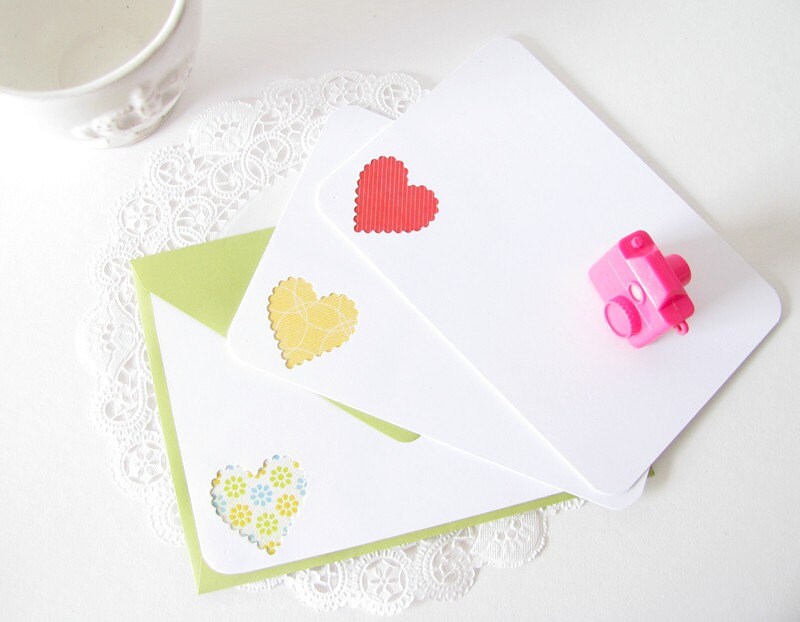
Whenever you purchase from AJSWEETSOAP you will receive along with your order a kawaii/cute cupcake mini card from Ilovedielines Studio (me)

Friday, October 8, 2010

Ilovedielines Studio is Back


Hello my friends,
I'm sorry I know I'm bad for not update my blog. But this time (2010) is going to be different :D, I will update my blog at least once a week with new promos, process of my work and much more. I hope you can enjoy it along with my experience in Etsy and Handmade Stationery which I love to do it and so I'm making this my full time job.


Photo by: FromJapanWithLove